 Imagine transforming ChatGPT or Claude into your personal document specialist that can directly edit your Google Docs and create professional reports, format academic papers, build dynamic tables, and organize your entire Google Docs library. Google Docs MCP servers make this possible by creating a direct connection between your AI assistant and Google Docs. This guide will walk you through the setup process step by step.
What is MCP and why use it with Google Docs?
The Model Context Protocol (MCP) allows AI assistants like ChatGPT/Claude to interact with external tools and services. By setting up a Google Docs MCP server, you unlock powerful document creation and management capabilities that transform how you work:- Create professional documents: “Create a project proposal with a formatted header, executive summary, and table of contents”
- Sophisticated formatting: “Format my research paper with academic styling, double spacing, and proper citations”
- Dynamic tables & structures: “Create a comparison table of product features with formatted headers and alternating row colors”
- Intelligent organization: “Set up a complete project folder structure and organize my existing files by type and date”
- Automated templates: “Create personalized versions of this document template for each team member”
Setup instructions
Step 1: Create a Google Cloud project and get credentials
- Go to the Google Cloud Console and sign in with your Google account.
-
Create a new project:
- Click the project dropdown near the top and select New project
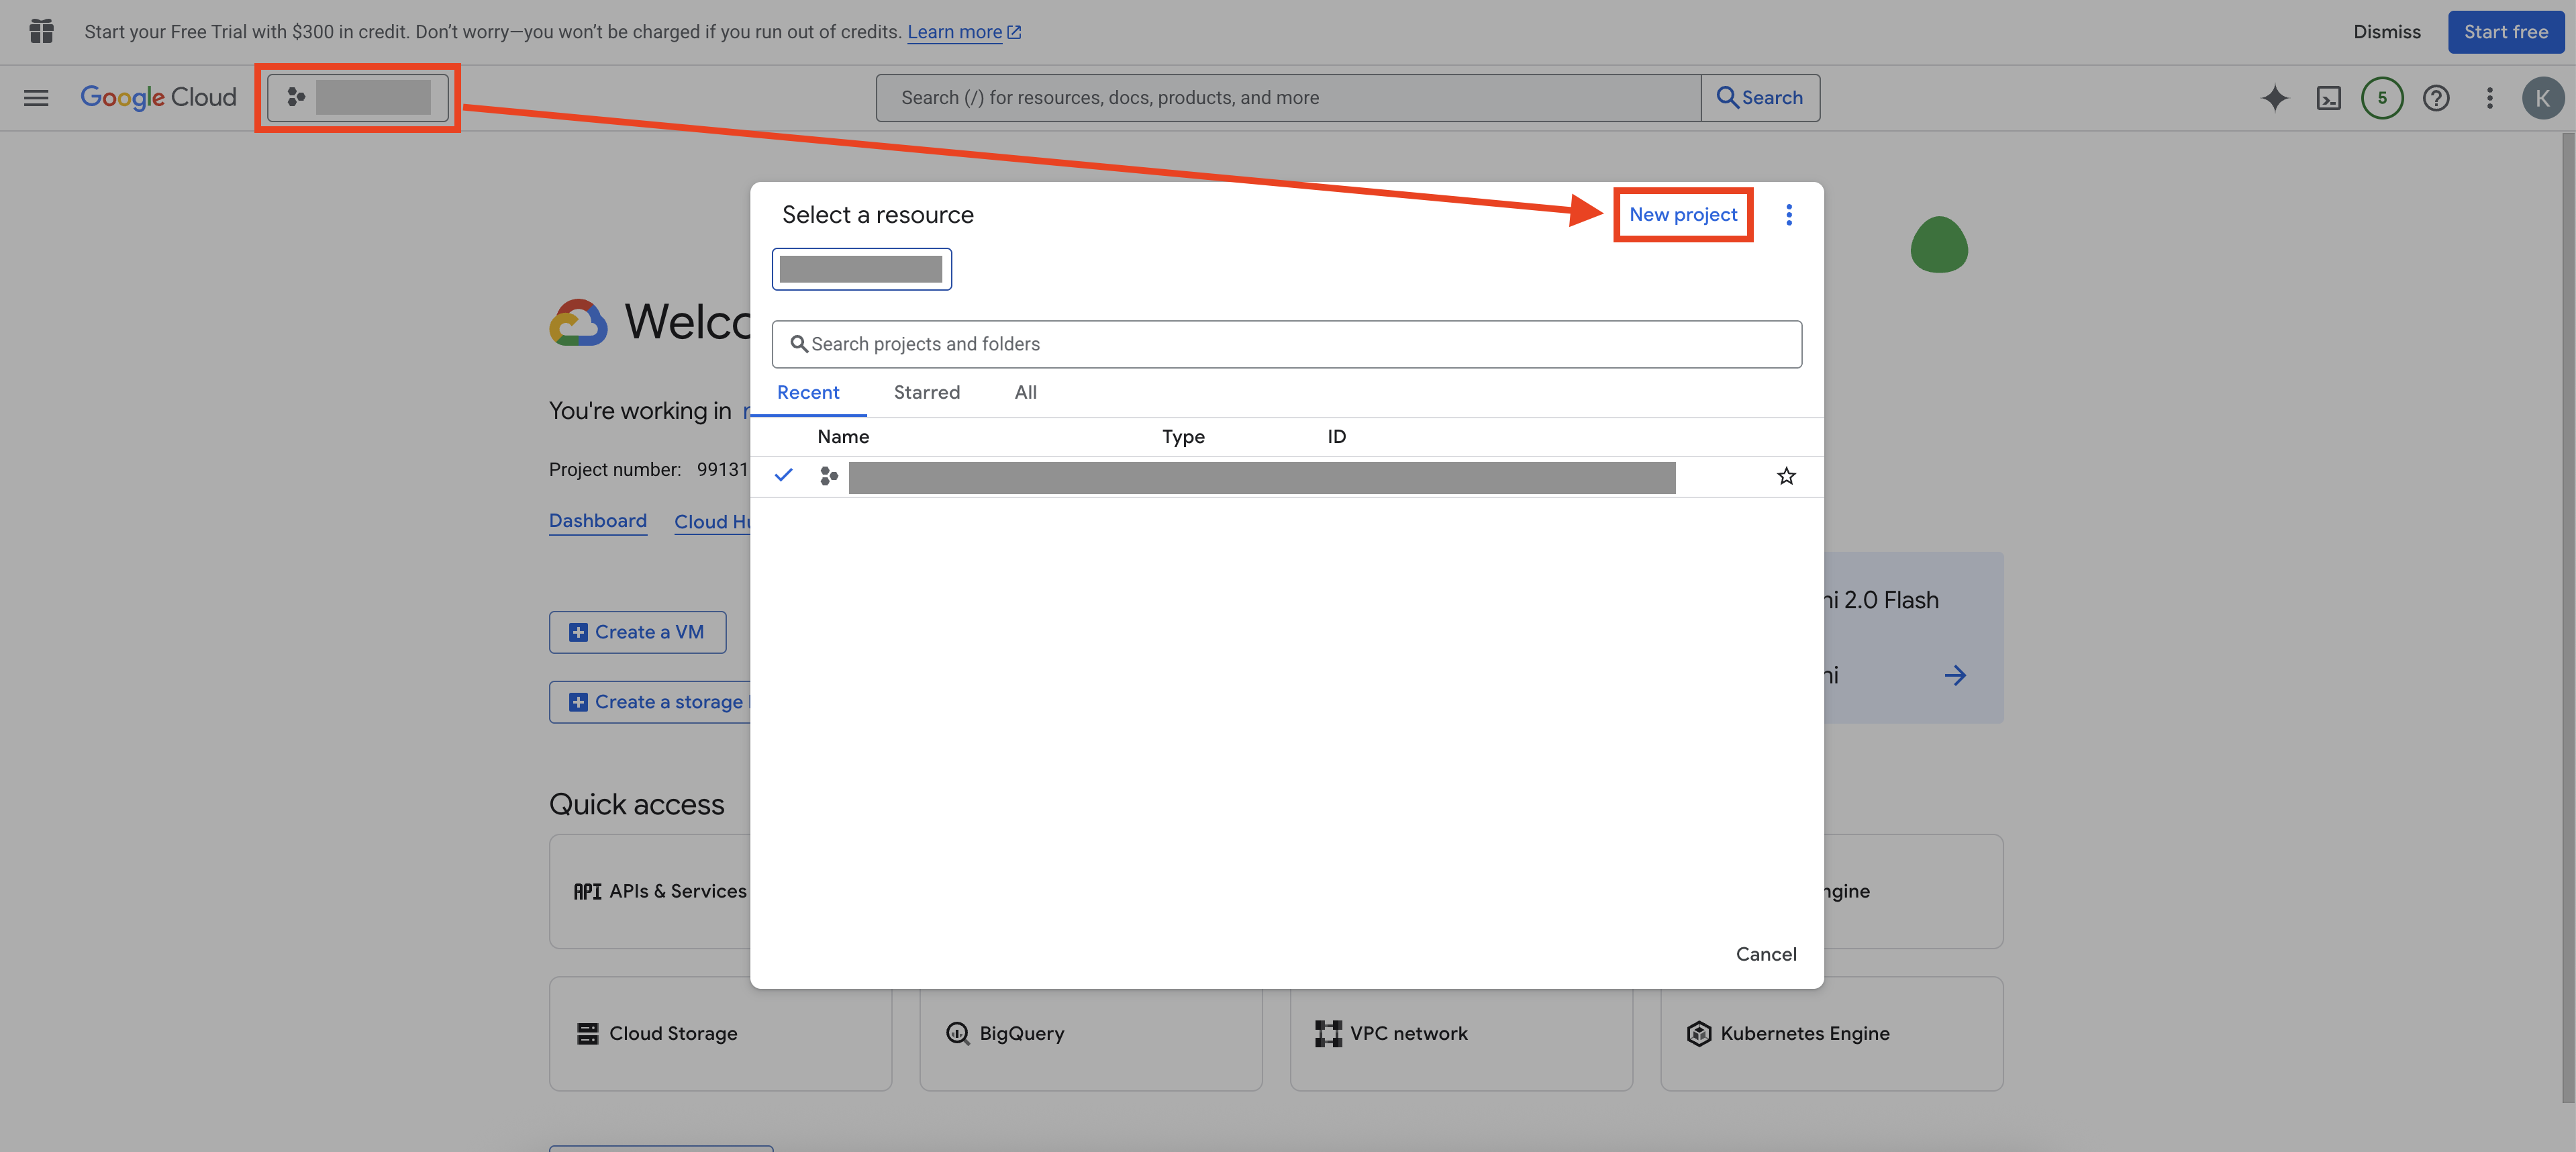
- Give the project a name, select an organization and location, then click Create
-
Enable the required APIs:
- In the search bar, type and select Library
- Search for
Google Docs API, click it, and click Enable - In the search bar, type and select Library
- Search for
Google Drive API, click it, and click Enable
-
Configure the OAuth:
- In the search bar, type and select OAuth consent screen
- On the Overview tab, click Get started
- For App Information, provide an app name and an user support email, then click Next
- For Audience, select External and click Next
- For Contact Information, enter an email address, then click Next
- Agree to the terms and click Continue, then click Create
- On the Audience tab, find Test users and click + Add users, add your email, then click Save
- On the Data Access tab, click Add or remove scopes
- Select the following scopes:
https://www.googleapis.com/auth/documents(for reading/writing docs)https://www.googleapis.com/auth/drive.file(for file access)
- Select the following scopes:
- Click Update
- Click Save
-
Create OAuth credentials:
- In the search bar, type and select Credentials
- Click + Create credentials and choose OAuth client ID
- Select Desktop app as the Application type, and fill in a Name
- Click Create
- Click Download JSON to download the JSON file
- Find the downloaded JSON file in your downloads folder and rename it to exactly
credentials.json
Keep your
credentials.json file secure! Do not share it publicly or commit it to public repositories.Step 2: Get and set up the server code
- Download and install Git.
- Download and install Node.js.
-
Open a terminal on your computer.
- On macOS: Press Command (⌘) + Spacebar to open Spotlight. Type
Terminaland hit Return. - On Windows: Press Windows + R, type
cmd, and hit Enter.
- On macOS: Press Command (⌘) + Spacebar to open Spotlight. Type
-
Clone the repository by copying and pasting the following command into the terminal and hitting Return/Enter:
We are using the Ultimate Google Docs & Drive MCP Server as example. You can use any other Google Docs MCP servers you want, but the setup steps might vary.
-
Navigate to the project directory by copying and pasting the following command into the terminal and hitting Return/Enter:
-
Drag your
credentials.jsonfile from the download folder into themcp-googledocs-serverfolder. -
Install dependencies by copying and pasting the following command into the terminal and hitting Return/Enter:
-
Build the server by copying and pasting the following command into the terminal and hitting Return/Enter:
Step 3: First run and Google authorization
-
Start the server by copying and pasting the following command into the terminal and hitting Return/Enter:
- In your terminal, you should see a message asking you to Authorize this app by visiting this url. Copy the URL following the message and paste it in your browser.
- Sign in with your Google account and grant the requested permissions by clicking Allow.
- You will see that the browser shows This site can’t be reached. This is expected.
-
Look at the URL of your browser, it should start with
http://localhost/?code=. Copy the part of the url betweencode=and$scope=(Do not includecode=and$scope=themselves), paste it into your terminal, then click Return/Enter.
Step 4: Configure Claude desktop
While ChatGPT doesn’t natively support MCP connections yet, Claude has built-in MCP capabilities. This guide focuses on using Claude Desktop for the best experience.
- Download Claude Desktop from Claude.ai.
- Install and open the Claude Desktop application.
- Close any terminal windows that are open.
-
Open a new terminal on your computer.
- On macOS: Press Command (⌘) + Spacebar to open Spotlight. Type
Terminaland hit Return. - On Windows: Press Windows + R, type
cmd, and hit Enter.
- On macOS: Press Command (⌘) + Spacebar to open Spotlight. Type
-
Copy the absolute path of the mcp-googledocs-server folder.
- First, navigate to the mcp-googledocs-server folder in your terminal by typing
cd mcp-googledocs-serverand hitting Return/Enter. - Then, type
pwdon macOS orcdon Windows, hit Return/Enter, then copy the output. (It should look something like /Users/yourname/mcp-googledocs-server) - Paste the copied output somewhere you can remember it. We will refer to it as the
absolute path of the mcp-googledocs-server folderin the next steps.
- First, navigate to the mcp-googledocs-server folder in your terminal by typing
-
Go to Claude > Settings… > Developer > Edit Config, it should display a file named claude_desktop_config.json. Open the file with a text editor.
- On macOS: Right click the file and select Open With > TextEdit.
- On Windows: Right click the file and select Open With > Notepad.
-
Paste the following into the file:
For the
args field, replace <absolute path of the mcp-googledocs-server folder> with the absolute path of the mcp-googledocs-server folder you copied in step 5.- Save the file by clicking File > Save.
- Close Claude Desktop completely and reopen it.
Using Claude with Google Docs
Now that everything is set up, you can start using Claude to interact with your Google Docs:- Open Claude Desktop and start a conversation.
- Ask Claude to perform tasks with your Google Docs, such as:
Click Allow always if Claude asks for permission to use an external integration.
- Create professional documents: “In Google Docs, create a project proposal with a formatted header, executive summary, and table of contents”
- Sophisticated formatting: “In Google Docs, format my research paper with academic styling, double spacing, and proper citations”
- Dynamic tables & structures: “In Google Docs, create a comparison table of product features with formatted headers and alternating row colors”
- Intelligent organization: “In Google Docs, set up a complete project folder structure and organize my existing files by type and date”
- Automated templates: “In Google Docs, create personalized versions of this document template for each team member”
A simpler alternative: MCP Now
While the setup process above works well, it requires several technical steps and ongoing maintenance. If you’re looking for a more streamlined experience, the free MCP Now desktop app offers a much simpler solution.
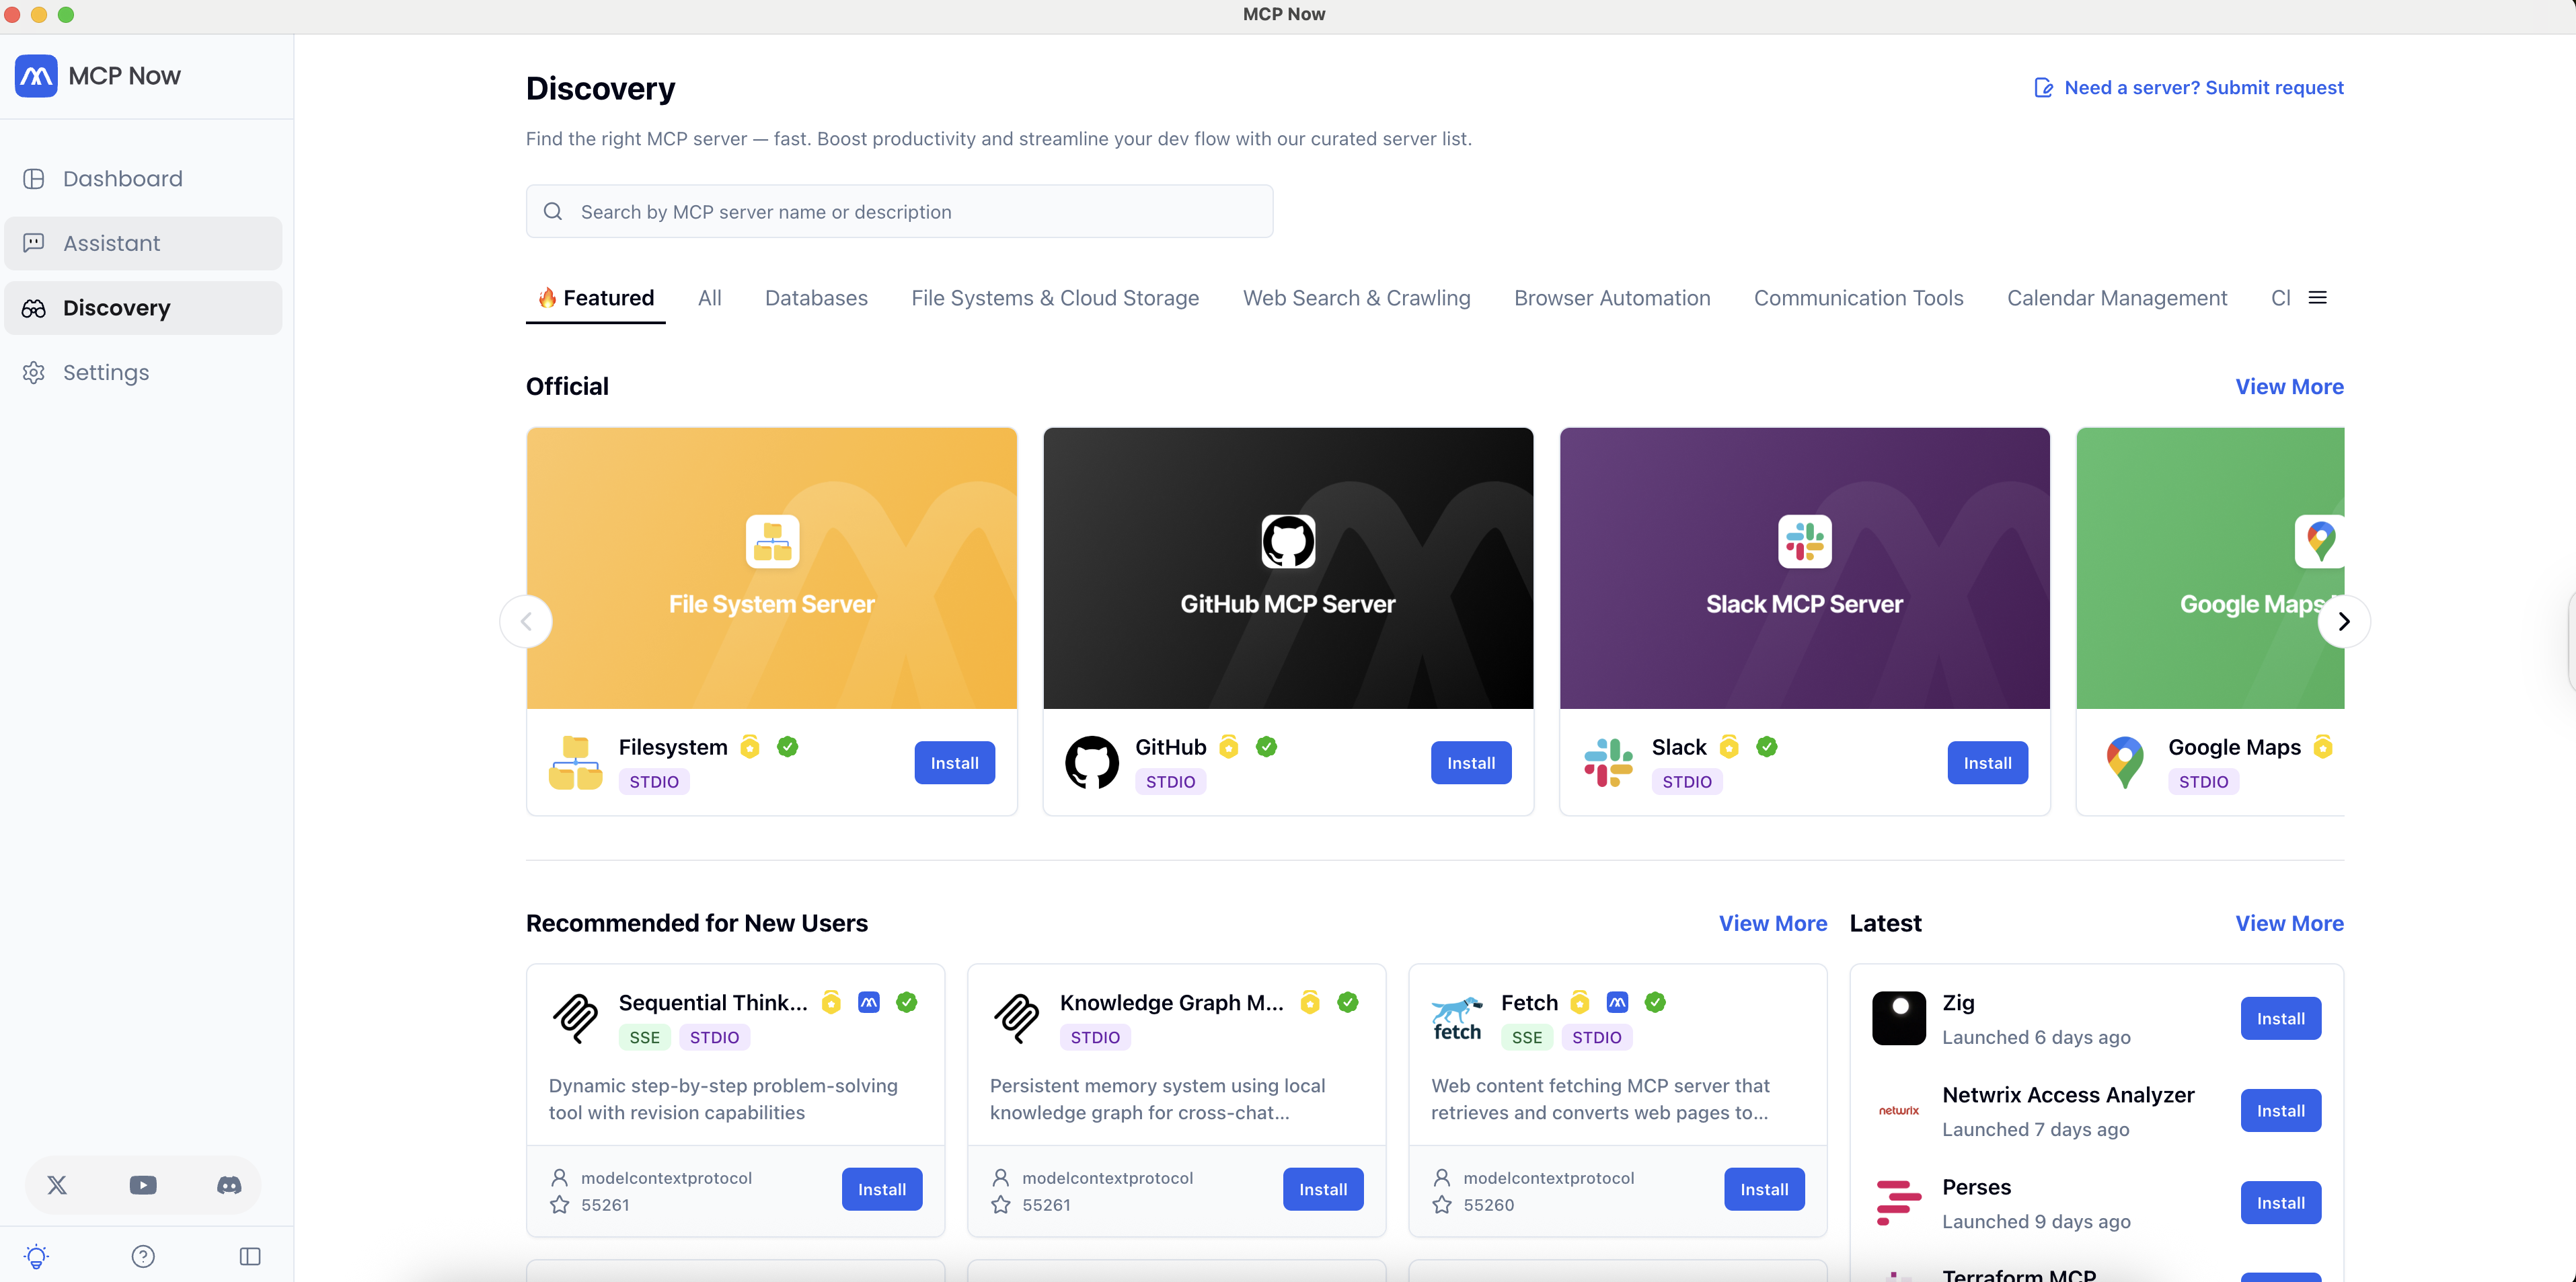
What is MCP Now?
MCP Now is a free desktop application that gives you a control panel for the entire MCP ecosystem, including Google Docs integration. With MCP Now, you can:Discover and install with ease
- Find new servers through curated lists, live rankings, and personalized recommendations
- Install instantly with one click—no setup or commands required
Manage everything from one place
- Switch servers mid-task without restarting apps
- Control hosts, profiles, and environments from a unified dashboard
Inspect, test, and share with confidence
- Explore integrated Tools, Resources, and Prompts to inspect issues faster, test changes safely, and troubleshoot with clarity
- Share full setups or individual servers with a secure link in just a few clicks
Setting up Google Docs MCP with MCP Now
- Download and install MCP Now
- Request a free access code from our Discord channel
- Open MCP Now and enter the access code to unlock its full features
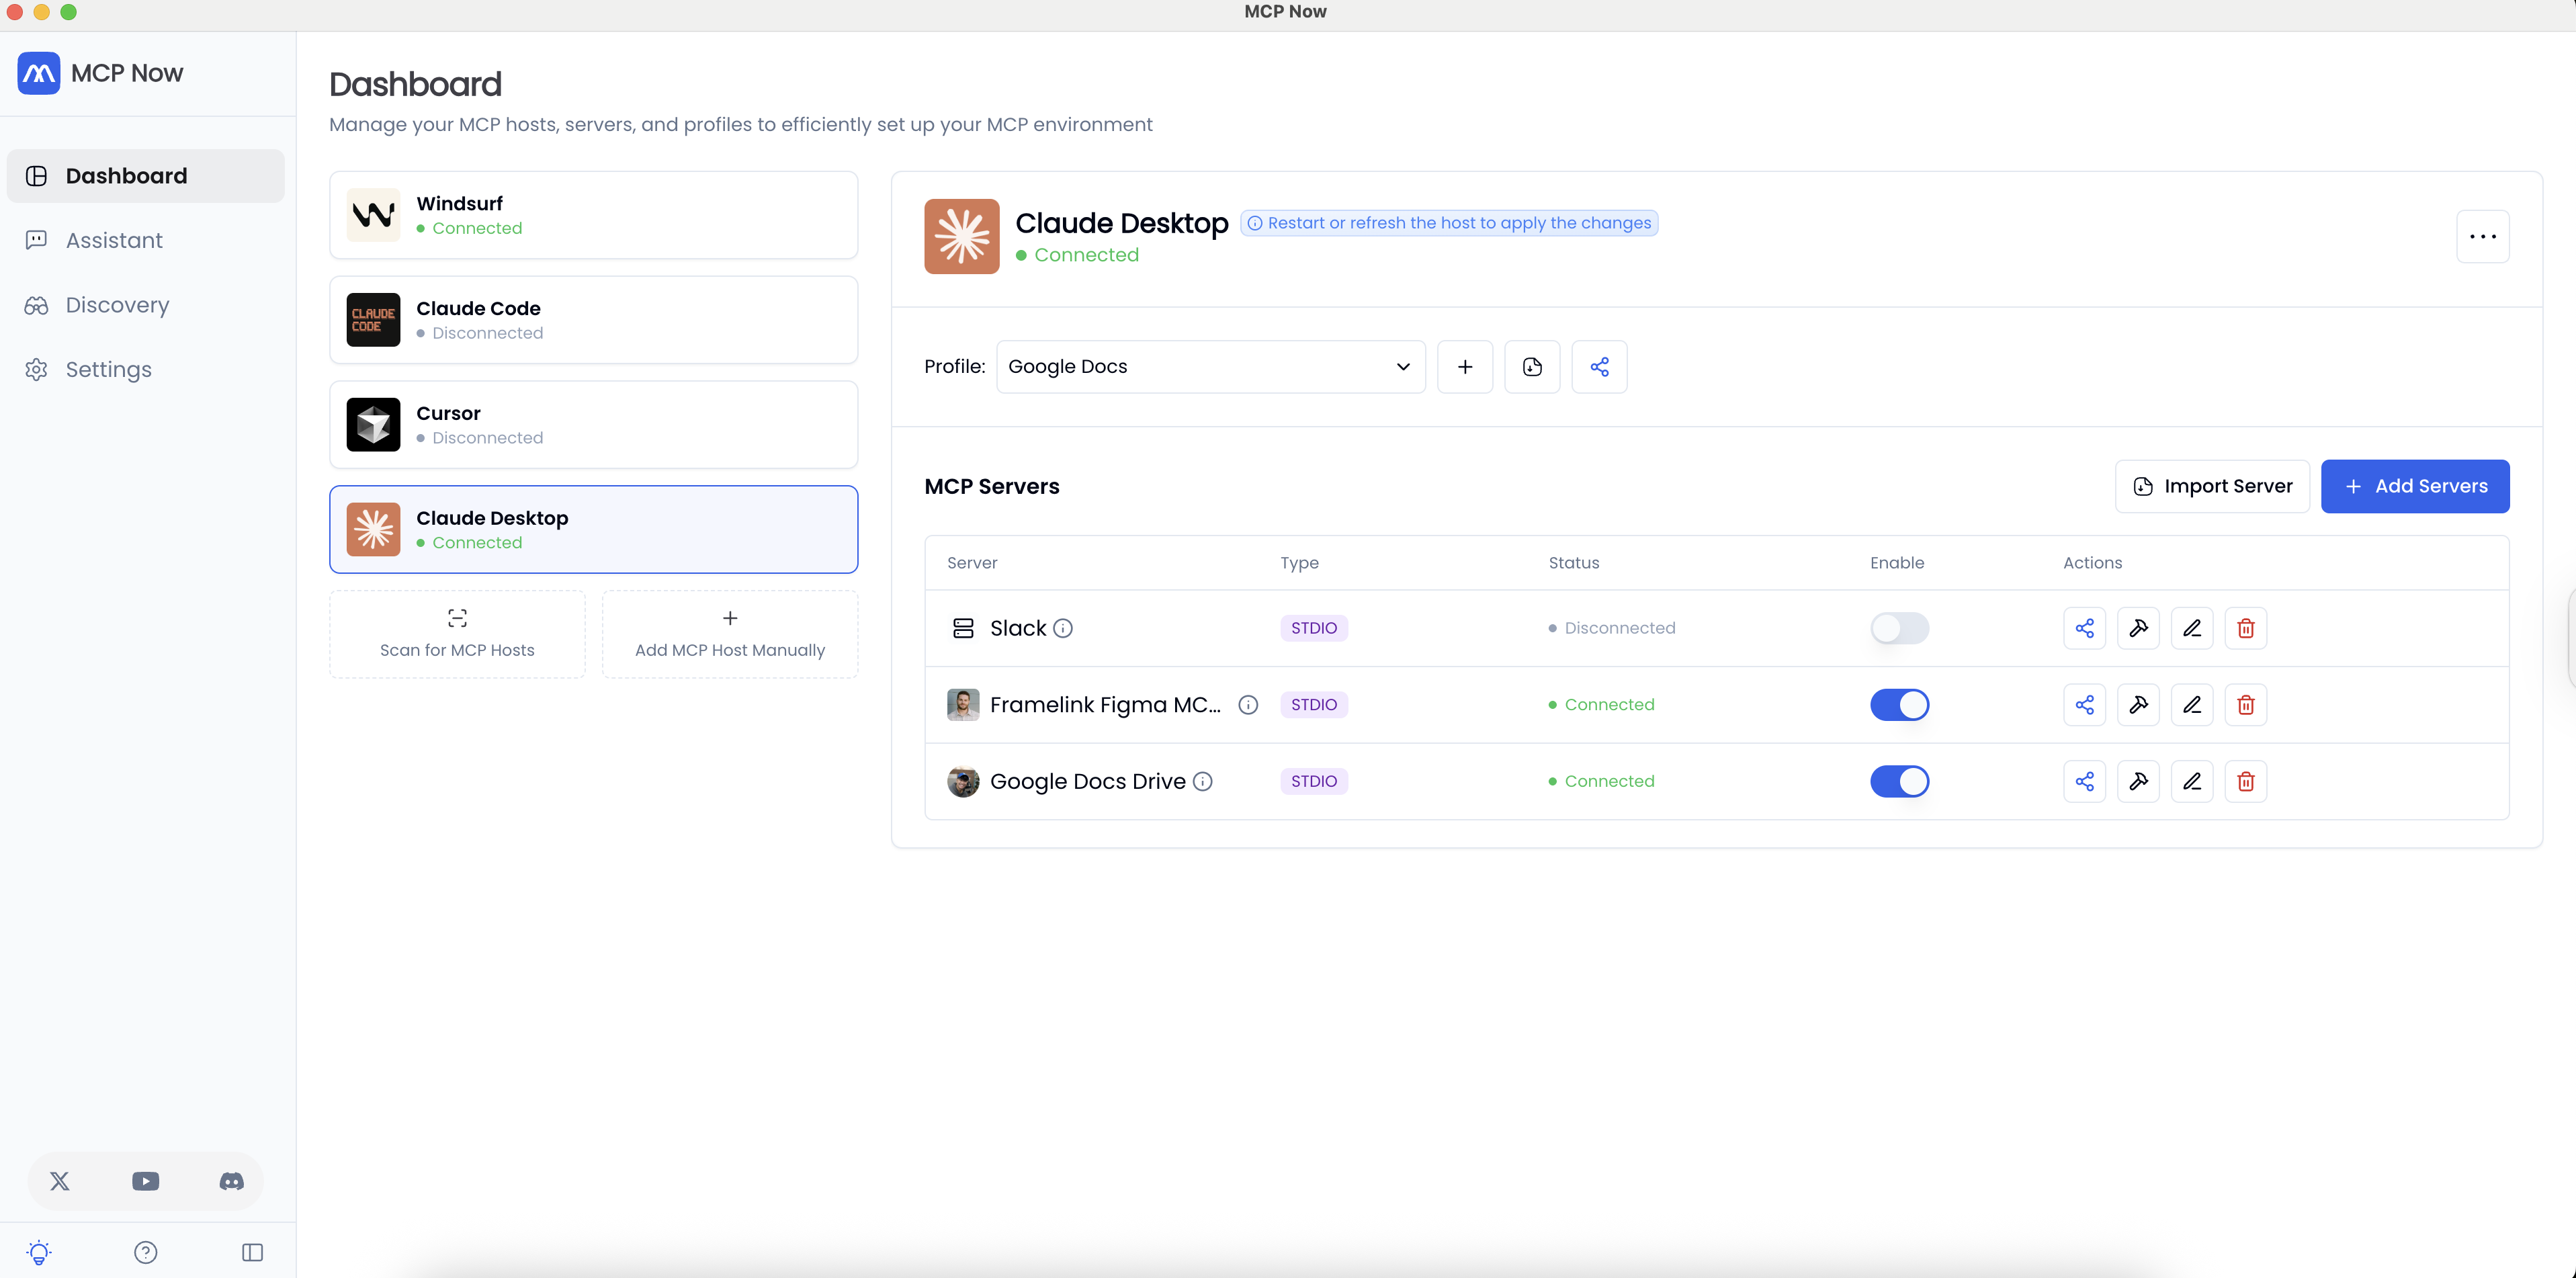
- On the Dashboard tab, click Scan for MCP Hosts, select Claude Desktop, then click Add Selected Hosts
- Click the Discovery tab, search for
Google Docs, find the MCP server named Google Docs Drive, then click Install - For Command Arguments, enter
node <absolute path of the mcp-googledocs-server folder>/dist/server.jsReplace<absolute path of the mcp-googledocs-server folder>with theabsolute path of the mcp-googledocs-server folderyou copied in step 5 of the Step 4: Configure Claude desktop section above. - For Add to Profiles (Optional), select Default Profile
- Click Install
- Close and reopen Claude Desktop
- On MCP Now, click the Dashboard tab, click Claude Desktop, and ensure Google Docs Drive’s status is Connected